![]()
Baja Bug
Rear Suspension Update
![]()
|
Page 4
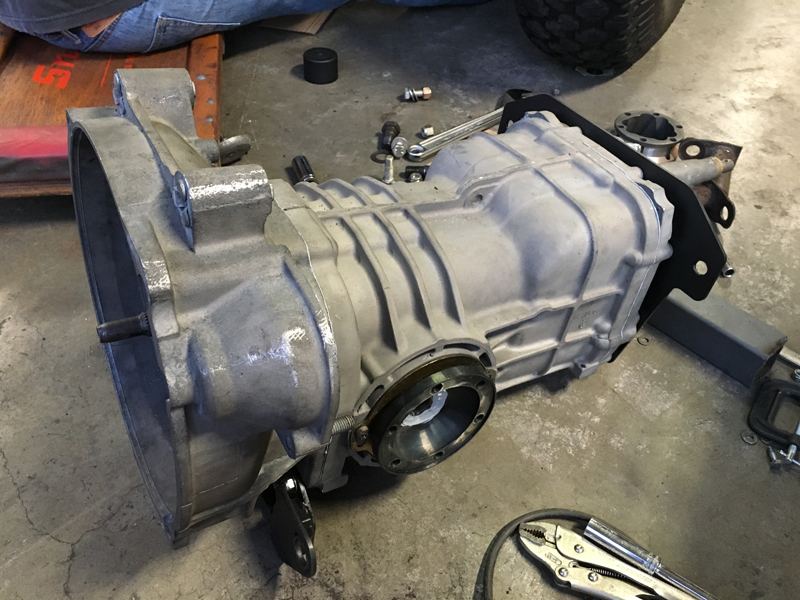
"002" Transaxle Installation
Our friends at "Base Camp Off-Road" graciously
donated a "002" transaxle that they had originally planned to use in
their 5/1600 car for their first race ever, the 2018 Baja 1000
(yeah, we know, that's not the ideal "first race"!).
The transaxle's history/condition was unknown and the "002"
transaxle isn't the ideal choice for a 5/1600 car for several
reasons anyway; following Trevor's
suggestion, they chose to purchase a new "race 091"
transaxle (the preferred transaxle for a 5/1600 car) rather than risk their Baja 1000 adventure on a huge
unknown.....
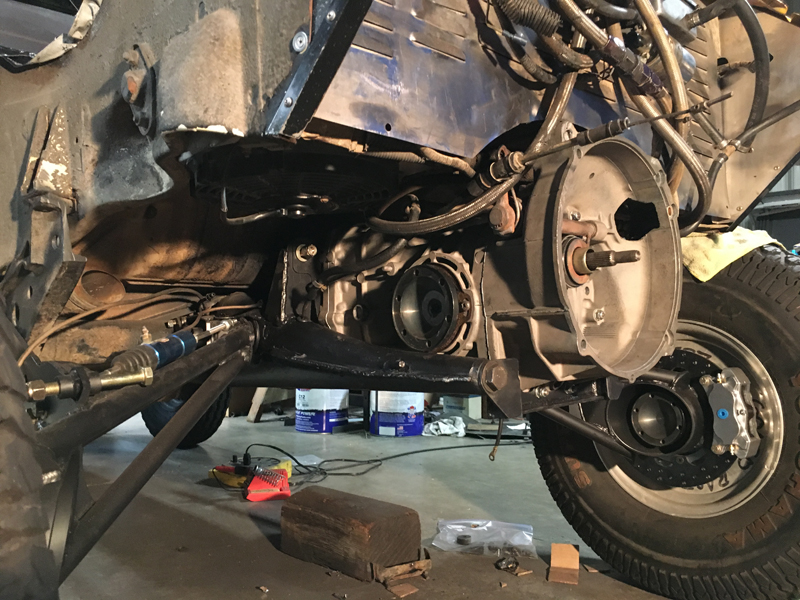
To begin, we installed a commercially available "mid-mount" near the front of the transaxle. We then slid the transaxle into the desired location and made templates for the rear mount (none of the commercially available mounts do what we wanted so we had to fabricate our own).
We elected to build the rear mount so that it took advantage of the stock frame horn motor mount bolts located at the rear end of the horns. This makes installation and removal of the transaxle fairly easy with no additional welded mounting tabs to wrestle the transaxle around - wish we could have done it that way on the 5/1600 car (different transaxle and mounting location, both vertically and horizontally).
The Bus transaxle is physically much larger than the stock beetle transaxle so we have to support it with custom mounts and run the "shift shaft" in a non-stock location - outside and above the "tunnel". The lower of the two holes you can see in the body between the frame horns is the stock location; the upper hole is where the shaft will now be located. This will require a change to the gear shift lever location also.
Here, you can see both the front and rear mounts and how they support the transaxle with minimal structure added to the car. The front mounts required some structure be added to the frame horns but the rear mount simply engages the existing mount location (the two large bolts you can see at the very rear of the frame horns).
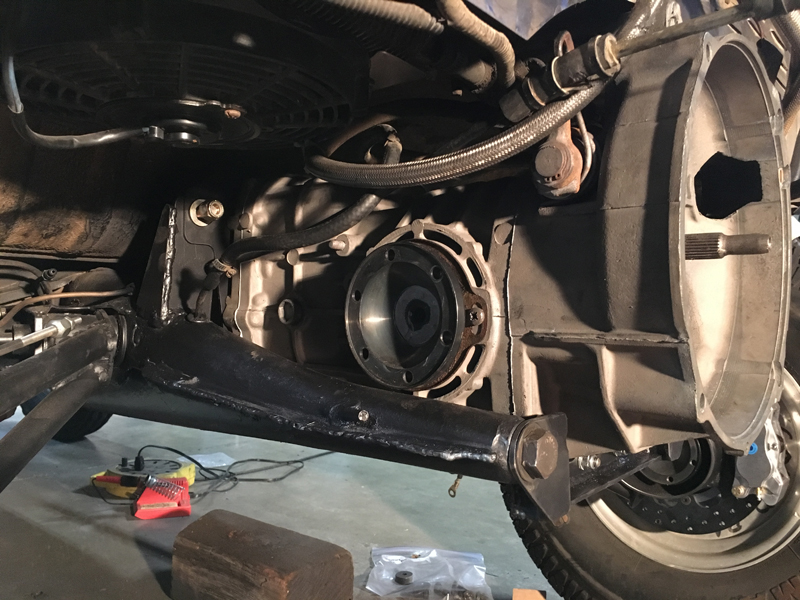
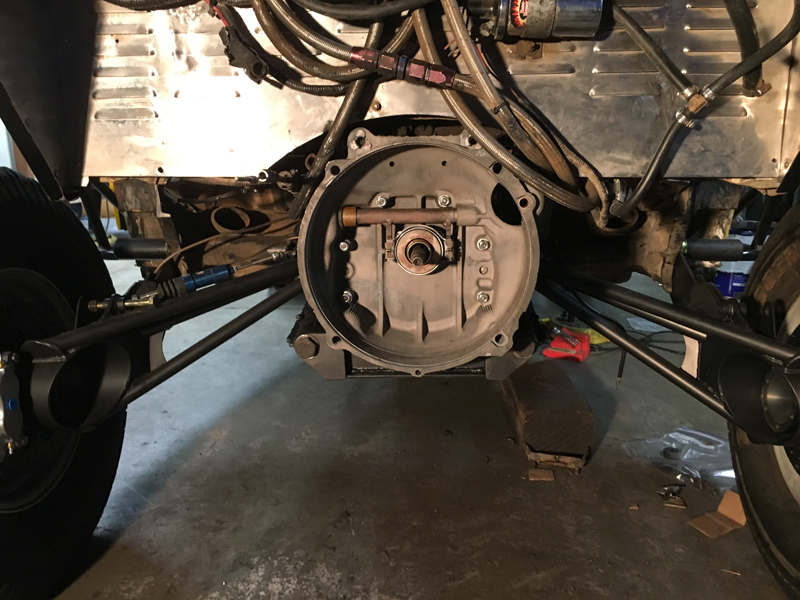
We have about 1/8" clearance between the CV housings and the frame horns with this configuration. If this were to be a "race" car, we would have "notched" the frame horns down to the seam you can see running horizontally along the side of the frame horn and mounted the transaxle a bit lower (about 1") for better CV angles and slightly more suspension travel. We are building a pre-runner though; we chose not to go to that much effort. Similarly, had this been a race build, we would have mounted the transaxle as far towards the front of the car as possible - that would require a lot more work and a big hole into the passenger compartment though; we chose to mount it as far forward as possible without cutting (much) into the body. That choice actually improves our CV angles as the suspension cycles and has the added benefit of improving access to the engine accessories mounted on the firewall - it was really tight before....
This completes the basic transaxle mount fabrication/installation. Looking closely though, you'll notice the two "hanger" mount bosses at the top of the bell housing are not attached to anything yet; just as in our 5/1600 car, we'll engage those mount bosses with a structure that connects the rear roll cage to the frame horns - stiffening the entire rear end of the car and further distributing the rear suspension shock loads.
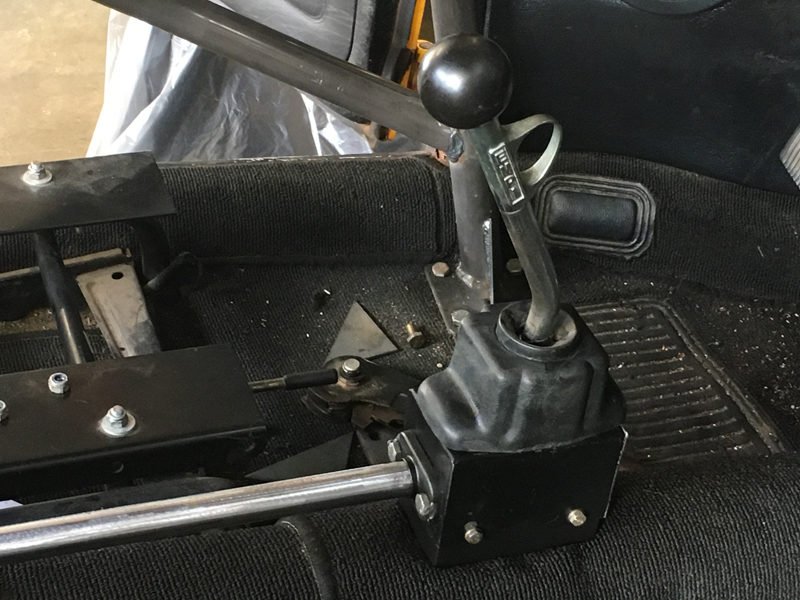
We fabricated this adapter to support the new shifter box at the correct height. It bolts to the stock shifter mount location on the tunnel, then the new shift box mounts on top of it - providing a stiff and secure mount at the correct height for the new shift shaft location.
This aftermarket shifter box replicates the stock shift mechanism and allows us to mount it wherever we want. We took care to make sure everything was in proper alignment and that there is no slop or binding. The shift lever is shorter than stock so the knob is at about stock height. We actually used this shifter assembly in our 5/1600 car for the first year or so - it works fine but adjustments are a little "fiddly"..... If we have trouble with it, or just want something a little nicer, there are better aftermarket shifters available - but we had this one on-hand.
Here's the whole installation looking from rear to front. With the shift tube exposed like this, we'll need to make a protective cover for it so foreign objects don't interfere with normal shifting. The front seats will cover much of the exposed tube but the section between the transaxle "nose" and the back of the seats will be at risk otherwise.
We clearanced the cover's center section for the new shift tube location (we don't use the VW rear seat). The shaft's protective cover will be secured to this center cover and will extend from the rear firewall to the forward edge of the cover - that'll leave a very small unprotected section before the seats cover the tube again.
Page 4 |
![]()