![]()
Baja Bug
Rear Suspension Update
![]()
|
Page 5
"Final" Details
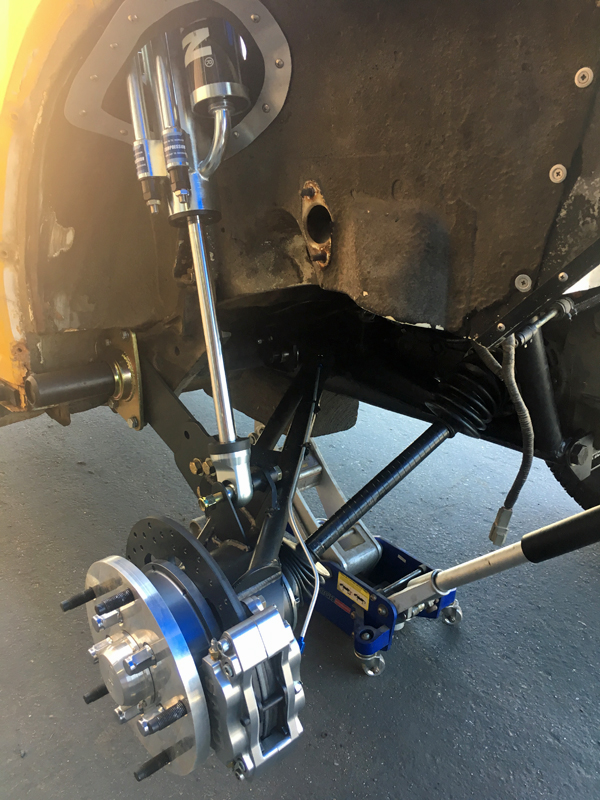
We spent hours "prepping" the stock GKN CV's so that we could achieve the angles you see here. The trailing arm is fully "drooped out" in this photo and the CV's are running smoothly without any binding. We'll probably install limit straps though; mostly to keep the spring plates from banging onto the bottom stops when the suspension unloads. That'll reduce our total suspension travel a small amount but it will add durability to the suspension.
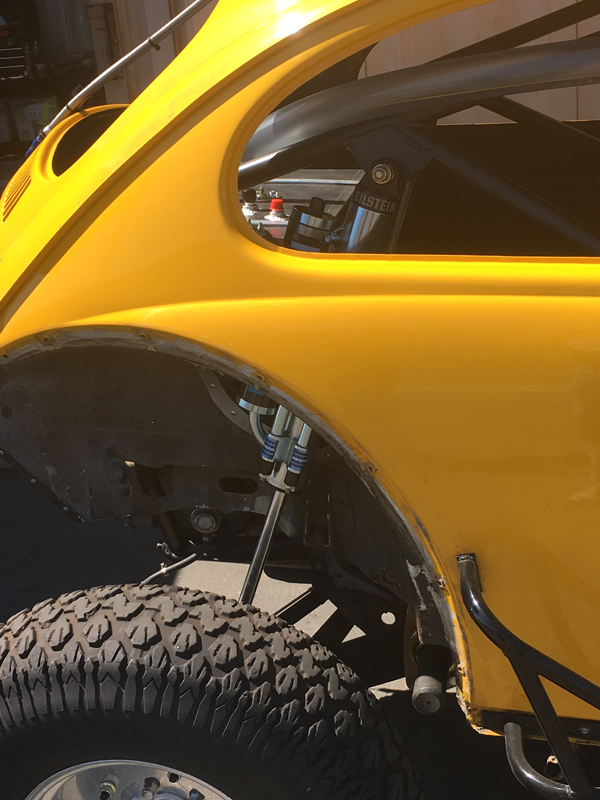
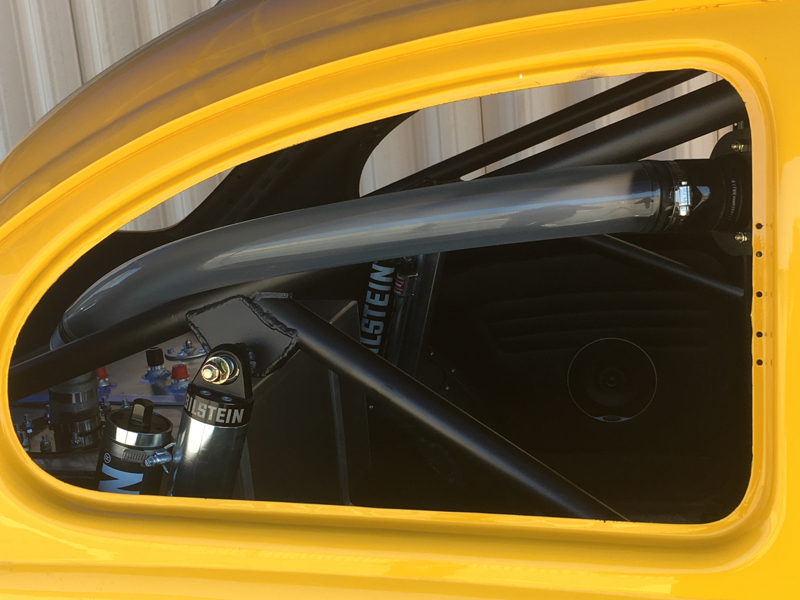
Here you can see the passenger side shock "final" installed and if you look closely, you can also see the seal we installed to close the body hole that we made for the shock. The aluminum ring secured to the wheel well holds a rubber seal that closely fits the shock profile. Also visible is the fuel cell filler tube.
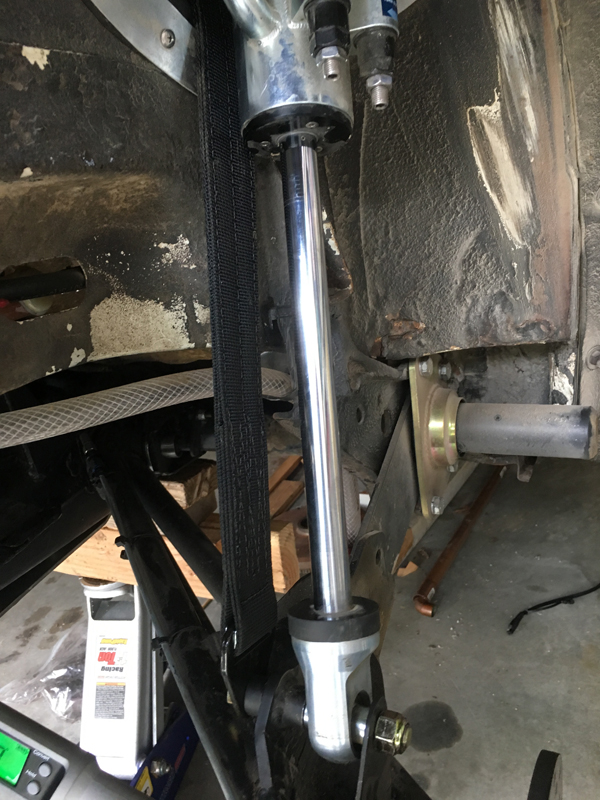
Limit straps installed to protect CV's
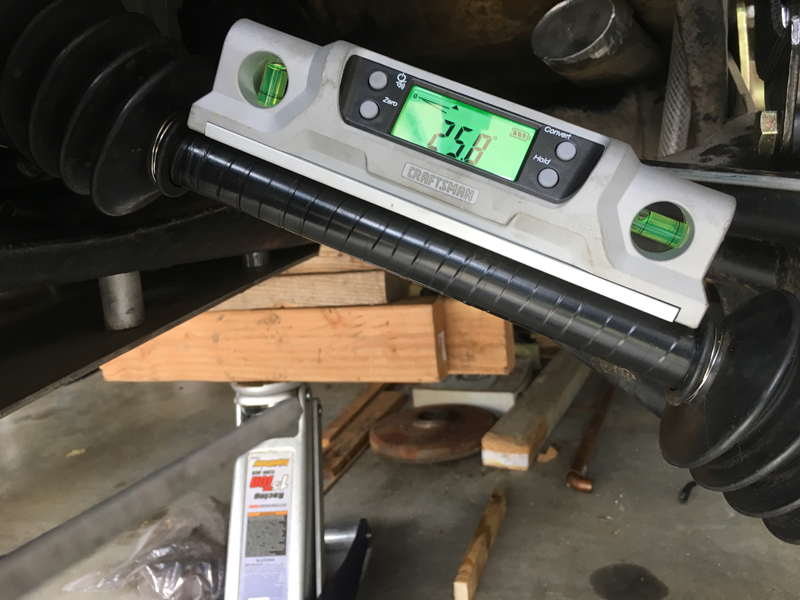
Maximum axle angle at "full droop" Race prepped "930" CV's are good to about 26.5 degrees; here you can see that ours are now limited to under 26 degrees. This costs us a small amount of suspension travel but it's important that we limit the CV's to their "reliable" working range. There is no appreciable "front/rear" angle to the axles so this reading is essentially the total CV angle at the transaxle. The CV angle at the microstub end (wheel end) is actually a little less due to the camber changes that occur with suspension travel (VW IRS geometry minimizes, but doesn't eliminate camber changes with travel; those camber changes actually reduce the wheel end CV angles at both the upper and lower limits of travel).
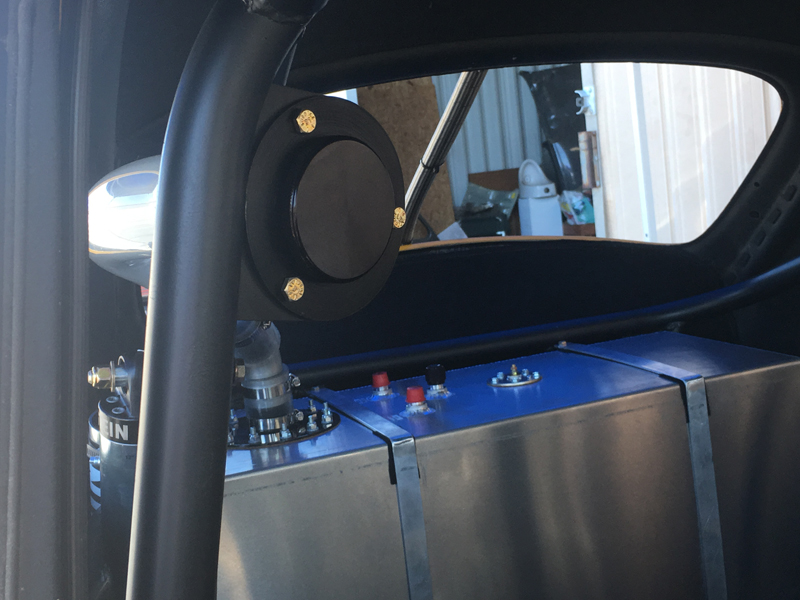
We installed a fuel cell on the shelf that would be behind the stock rear seat location, giving us the ability to carry an additional 19 gallons of fuel when needed. We'll have to adjust the rear torsion bar preload to account for the extra weight. We didn't want to cut a hole in the body for the fuel filler so we welded the filler mount to the "B" pillar and ran a hose to it. We'll be able to refuel through the passenger door (it's not a perfect solution but it'll work).
Here's the fuel cell and filler plate installed; the filler cap is angled so that a passenger will not come in contact with it but we'll still have easy access for refueling.
The fuel cell is now completely installed and wired - you can see the vent, fuel filler and fuel delivery hoses along with the fuel level sender wiring.
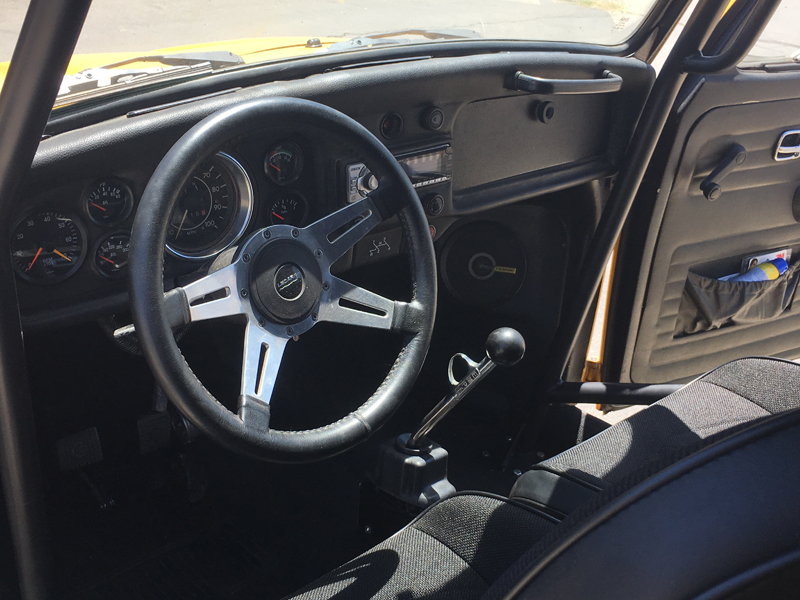
We've finished restoring the interior of the car; carpet, newly rebuilt seats and race harnesses installed. The harnesses are race car parts that are in "near new" condition but had "timed out" under SCORE's rules.
The suspension update is complete now, ready for a new rear bumper and engine overhaul. Once the rear bumper is fabricated, we'll reinstall the rear fenders - then it's just a matter of reassembling the engine and bolting it in place (the engine case is installed here to help in designing a new rear bumper).
Page 5 |
![]()