|
Chassis Wrap
The choice of the exterior finish was
something we discussed since the beginning of the build. A
simple paint finish would be fine but we wanted something a
little different... We've spent so much time in Baja
racing and vacationing that we wanted to do something to
commemorate all the adventures and great friendships we've had
along the way.
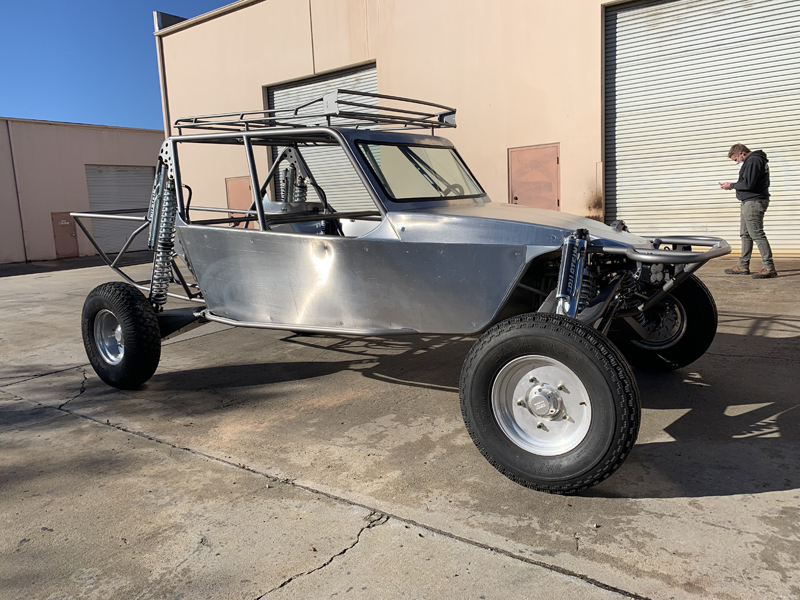
Bare chassis, ready for our wrap
All the sheet metal body panels installed after applying an "Alodine"
conversion process for corrosion protection. This process
includes an etch to remove surface oxidation then an immediate
application of the Alodine conversion coating to seal up the
surface. After the conversion process the final finish
process is applied over the top. Rather than paint, we
elected to apply a wrap that we were able to custom design.
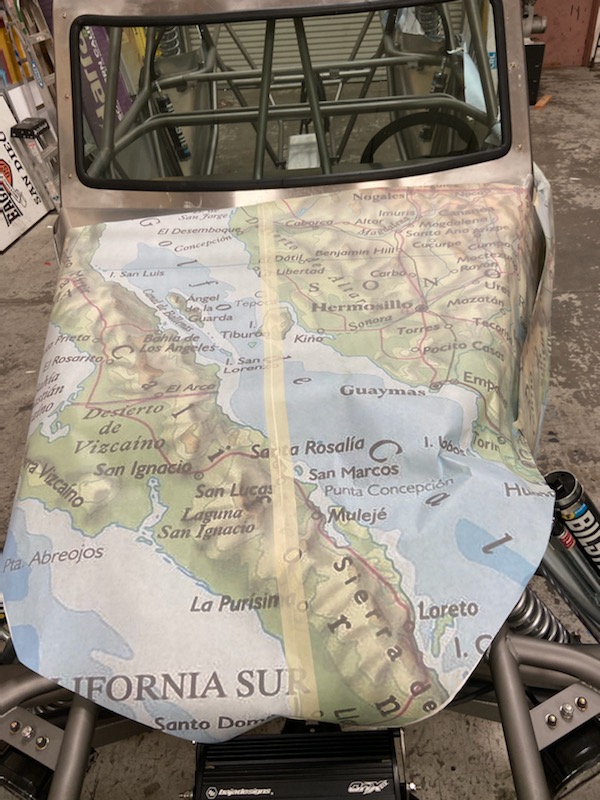
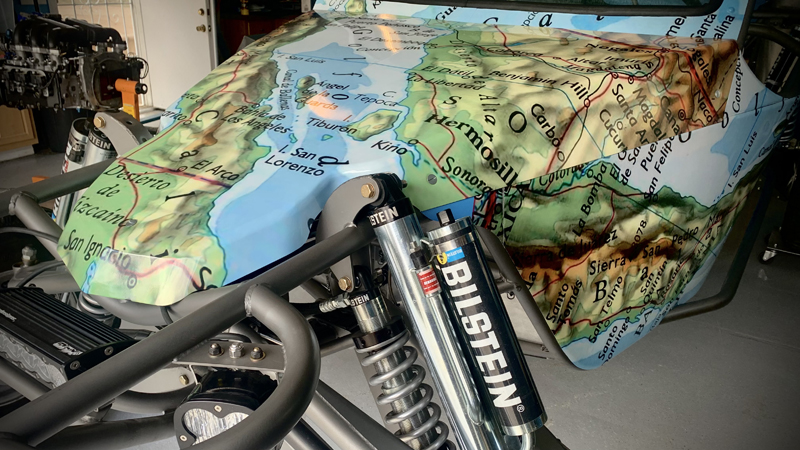
Mocking up the hood wrap
Prior to printing the vinyl wrap, our vendor spent time with
paper prints to work out the fitment and overlaps. Given
that the map we wanted to use was of the Baja peninsula, some
artistic discretion was involved...
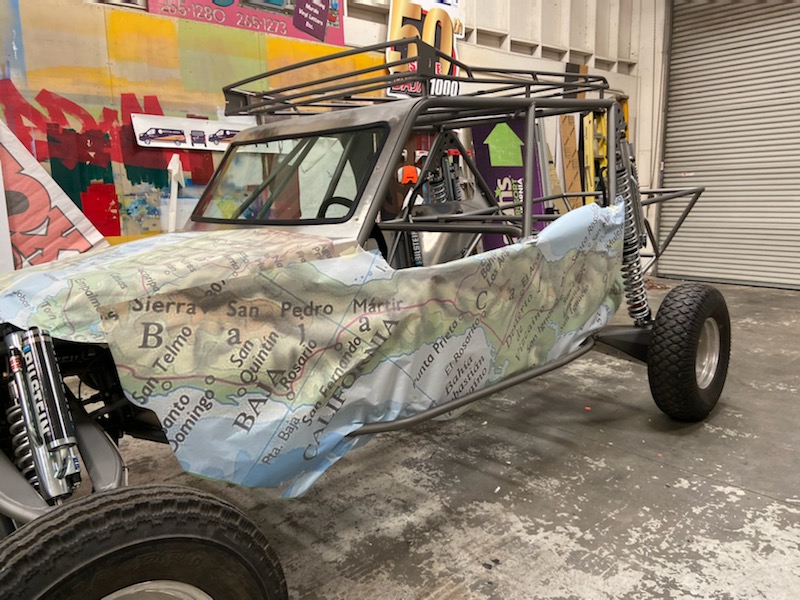
Mocking up the side wraps
We've worked with "CJ Norby Signs" in El Cajon, CA for many
years; it was an easy choice to have them do the wrap for us.
It was a long process of talking with Carol about our idea,
getting the artwork to her, having her design the final layout
and then having her apply the wrap. Carol did an
outstanding job for us at a great price!

Carol and Mark getting the car ready to
bring home
Trevor and I were stunned the first time we saw the wrap - it
really grabs your attention! The photo doesn't capture how
vibrant the colors are; it really "pops!"
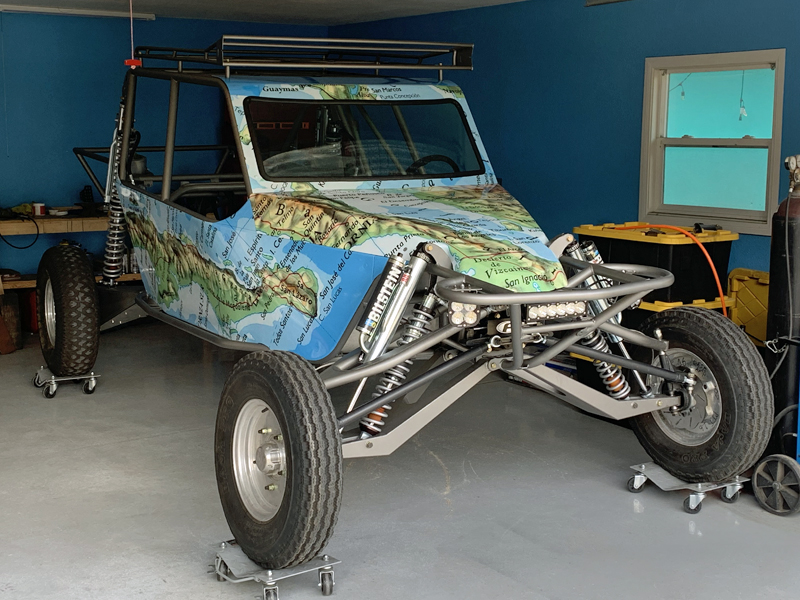
Back home in the garage
Finally, back in the garage where we have control over it!
We still have chassis work to complete and we don't want to
damage the wrap so we removed all the panels to store them
safely. We'll leave them off until all the chassis work is
complete and we're ready to close it up for the last time.
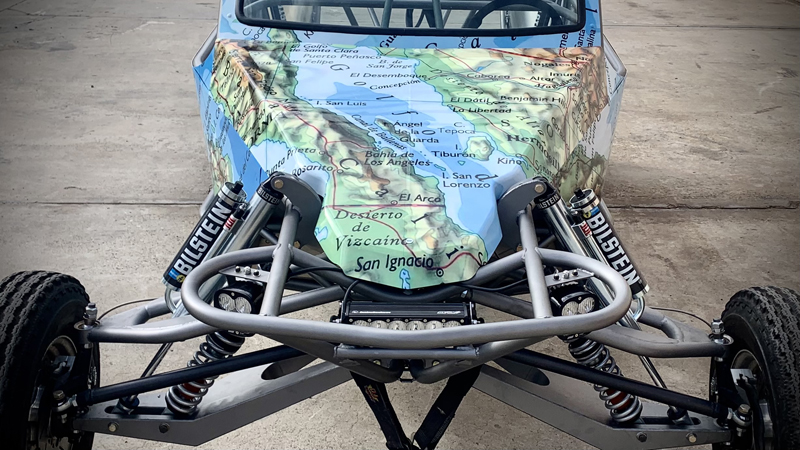
Front view of the car
I really like this view of the car!
Just one more photo!
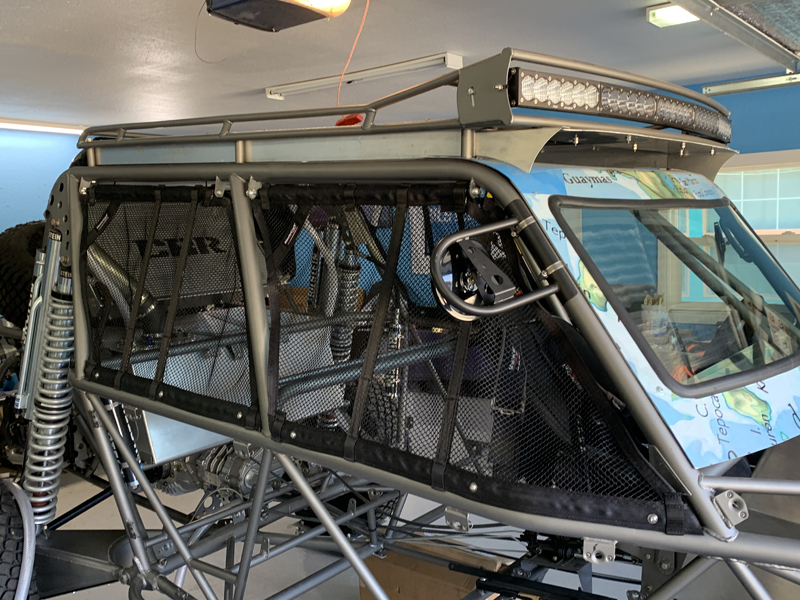
Window Nets
We chose to install window nets for
passenger safety; they are not required unless we race but
they're important safety items in the event of a roll-over.
The nets serve to keep flailing arms inside the chassis where
they're less likely to be crushed between the ground and
chassis... The nets are quickly removed with one hand when
necessary, either from inside or outside the car. Ours
were made by MasterCraft Safety from individual patterns that we
provided to them.
"Passenger side" Window Nets
The "driver side" nets are a mirror image of these.
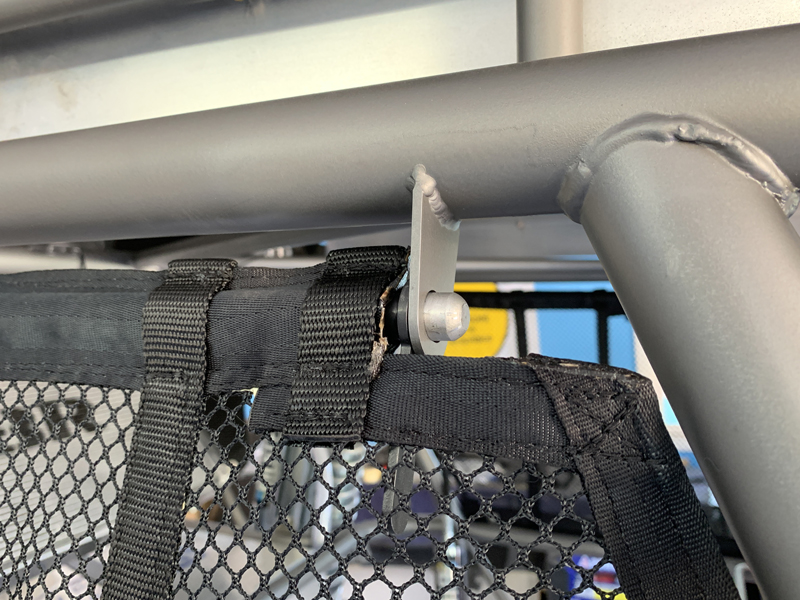
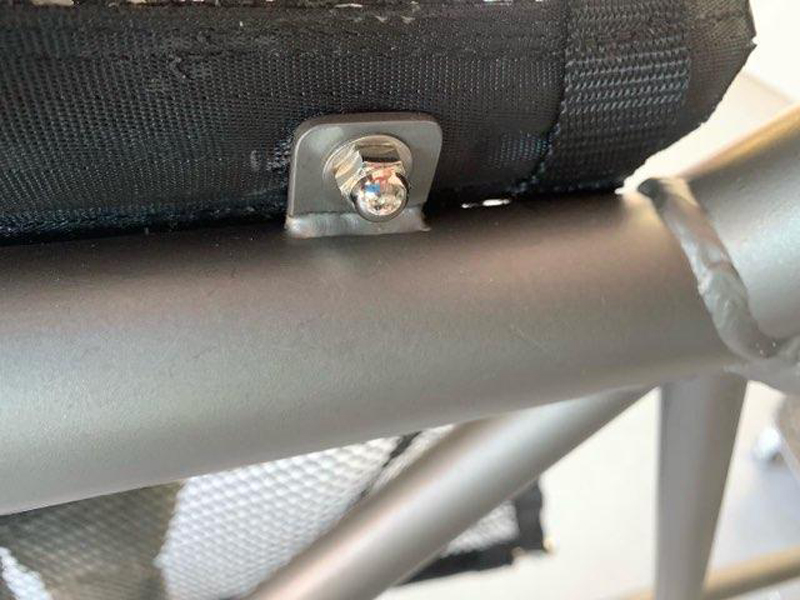
Upper Front Mount Tab
The upper support bar is spring loaded so that
it is retained in the window opening but is easily removed by
pulling rearward on the handle that protrudes into the passenger
area. The handle is barely visible through the net in this
photo.
Upper Rear Mount Tab
This is the "spring loaded" end of the
upper support bar - it allows the bar to slide rearward in order
to disengage the forward tab for removal of the window net.
The lower edges of the window nets are fixed to the chassis;
once the upper bar is removed from the tabs, the net is simply
"draped" over the side of the car to allow entry/exit.
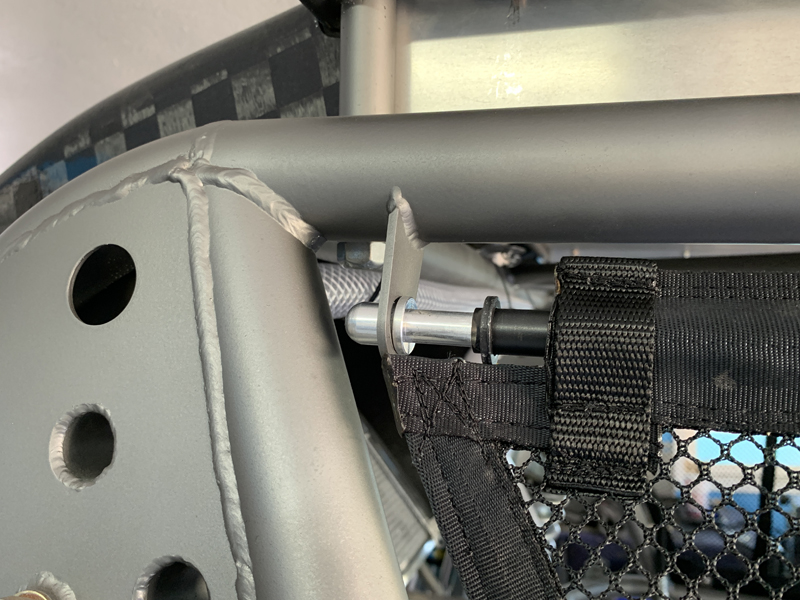
Lower Window Net Fastener
We used stainless steel fastners to mount the window nets
and "Acorn Nuts" on the inside of the chassis so that there are
no sharp edges to catch as we get in or out of the car.
|