|
Now that the chassis is
protected with paint, we can begin the process of re-assembly.
We want the car in a "roller" condition as soon as possible so
we begin with assembly and installation of the front and rear
suspension arms. That's followed by installation of the
rear "mid board" hubs and the front spindles and hubs.
Once those are all installed, we can bolt on some wheels.
We're awaiting the arrival of our suspension springs; once they
arrive, we'll install them on our Bilstein "coil overs" bolt
them on and get the chassis off the jack stands.
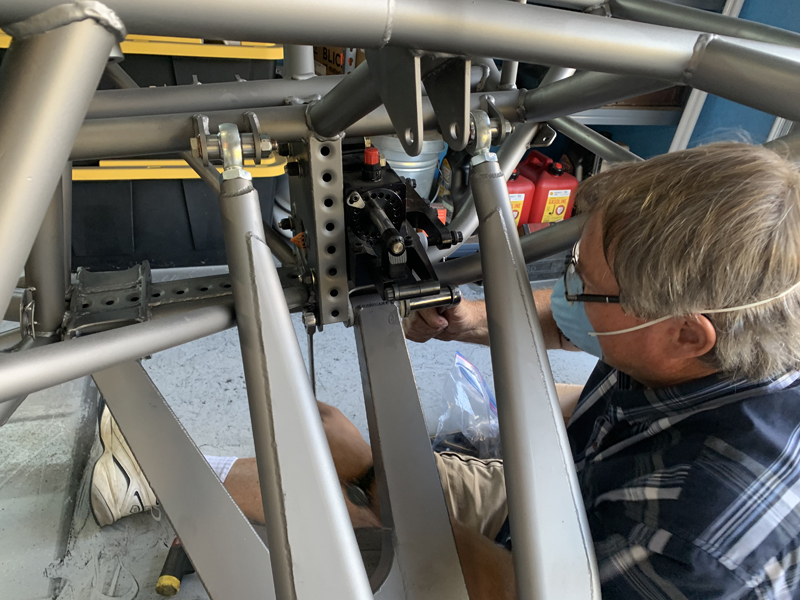
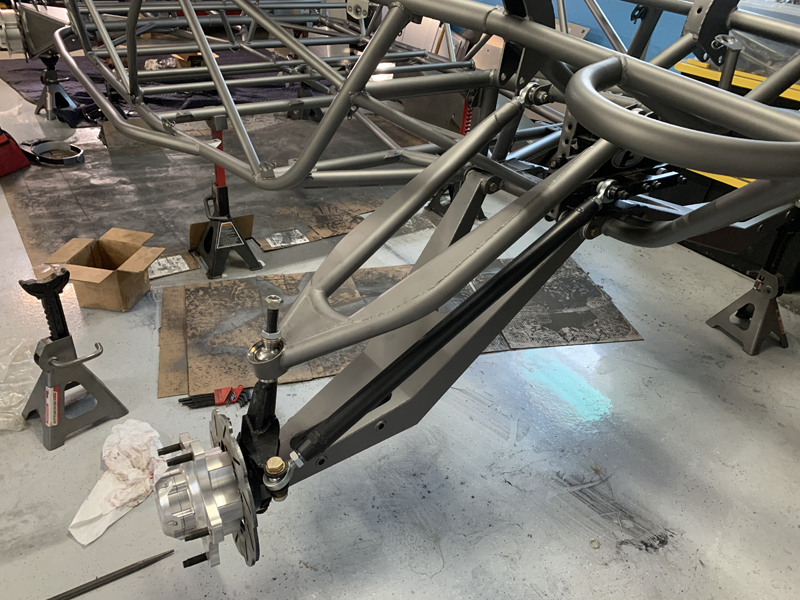
Securing the right side Lower Control Arm
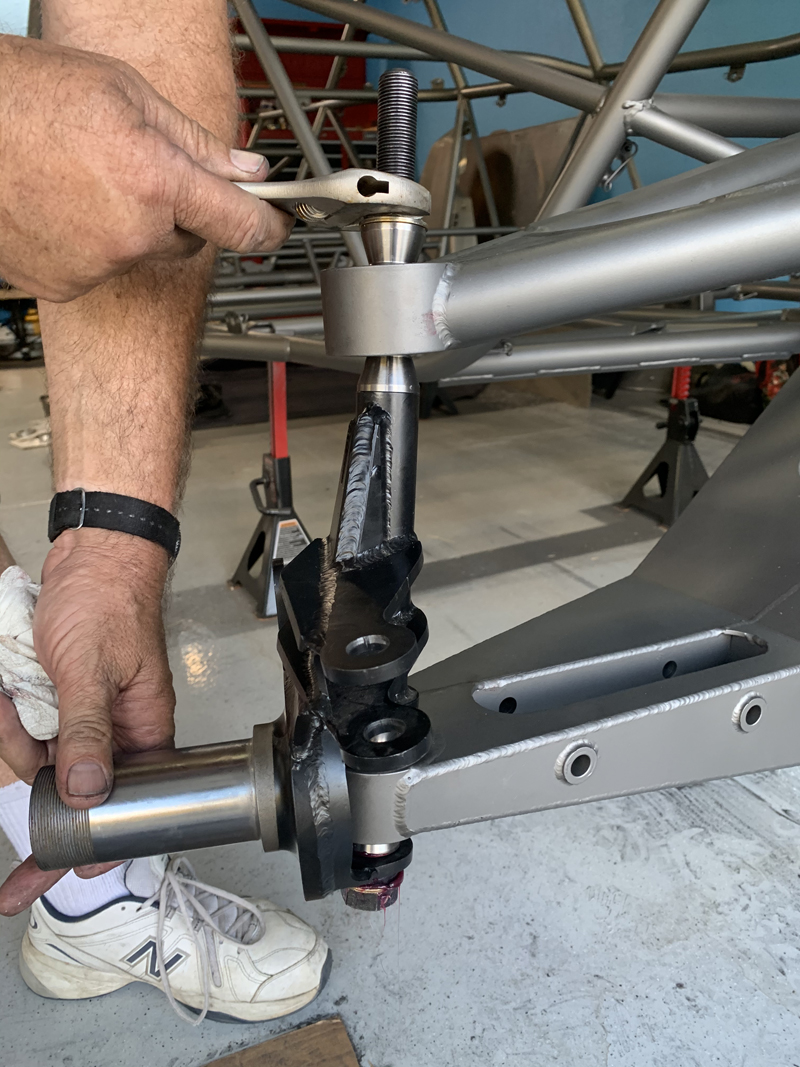
Installing the right side steering spindle
Right Front Suspension installed
Right Front wheel hub installed, axle nut
ready to be tightened and secured
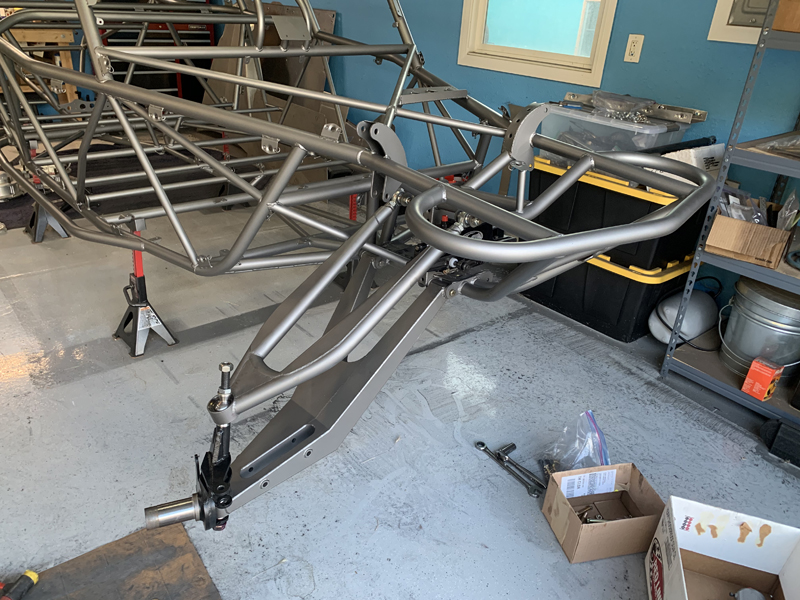
Right Front suspension assembled, ready for
wheel/tire and shocks
Wheel and Tire installed, just need shocks
and springs installed
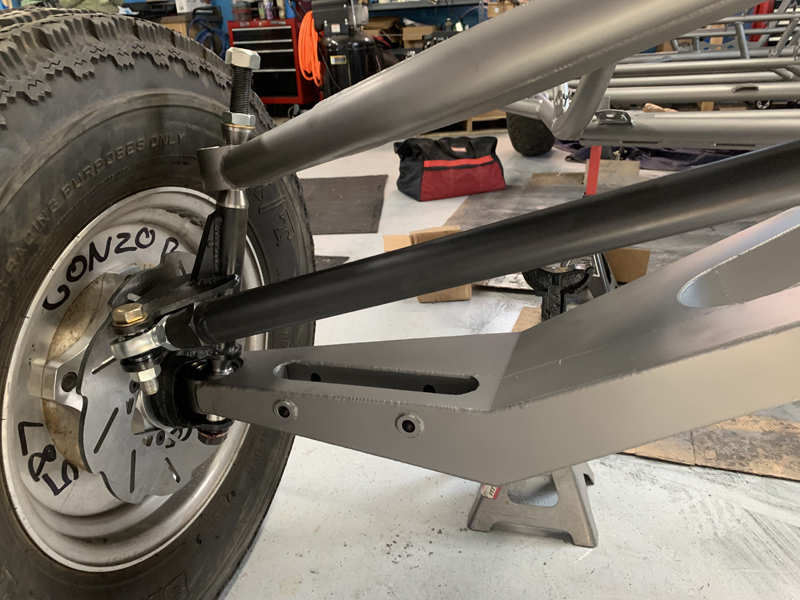
Right rear Trailing Arm installed
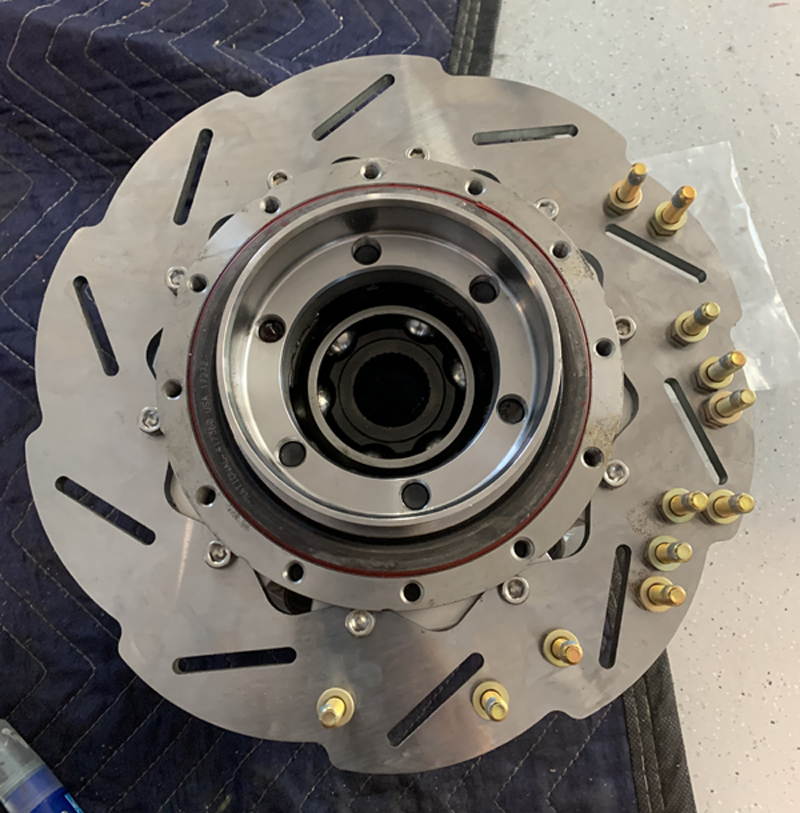
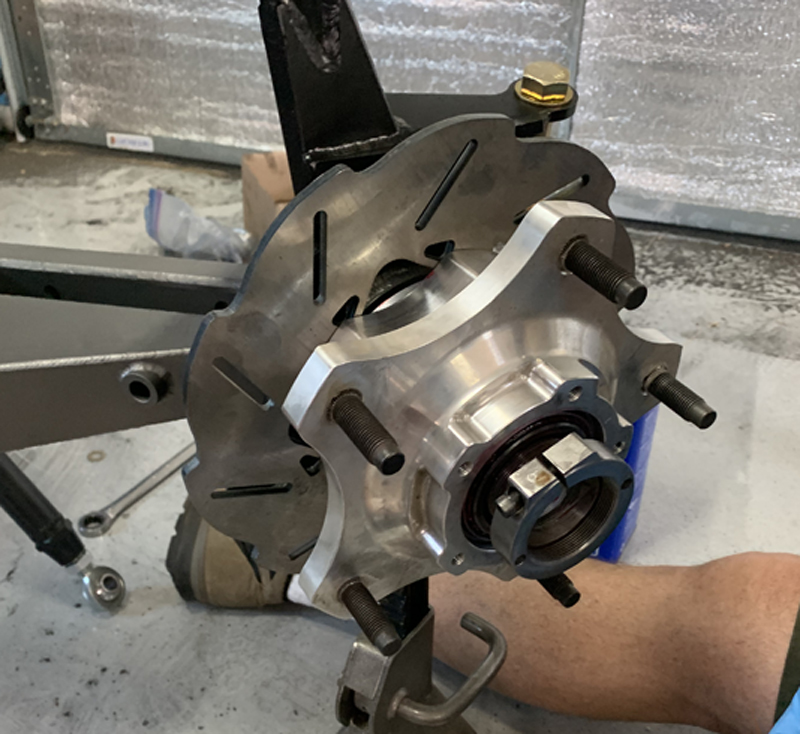
"Mid Board" Hub ready to install
This combines the rear wheel bearings, wheel mounting flange,
brake rotor and CV in one "bolt-on"package
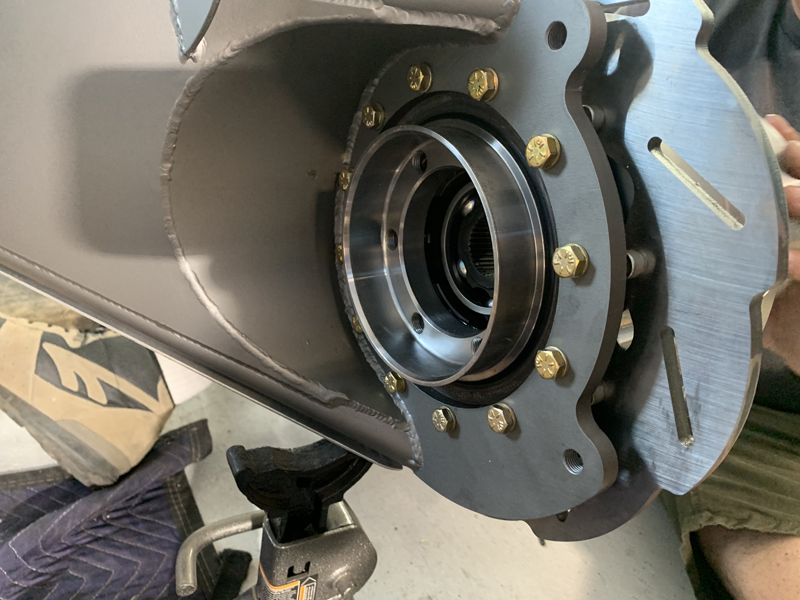
Right side hub installed and ready for a
wheel/tire
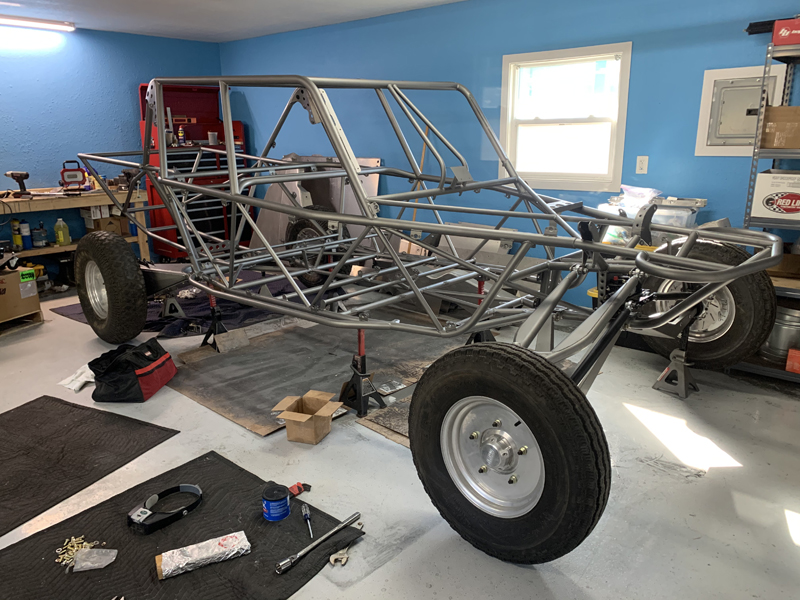
Temporary wheels/tires installed
These wheels/tires are some of
our 5/1600 car spares and are only installed to allow us to
easily move the car around. When we get closer to
completion, we'll install the permanent set.
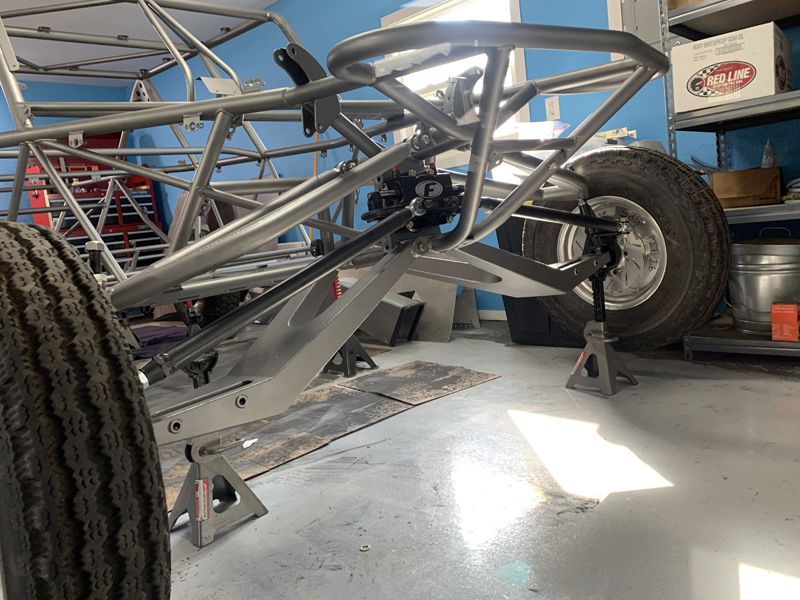
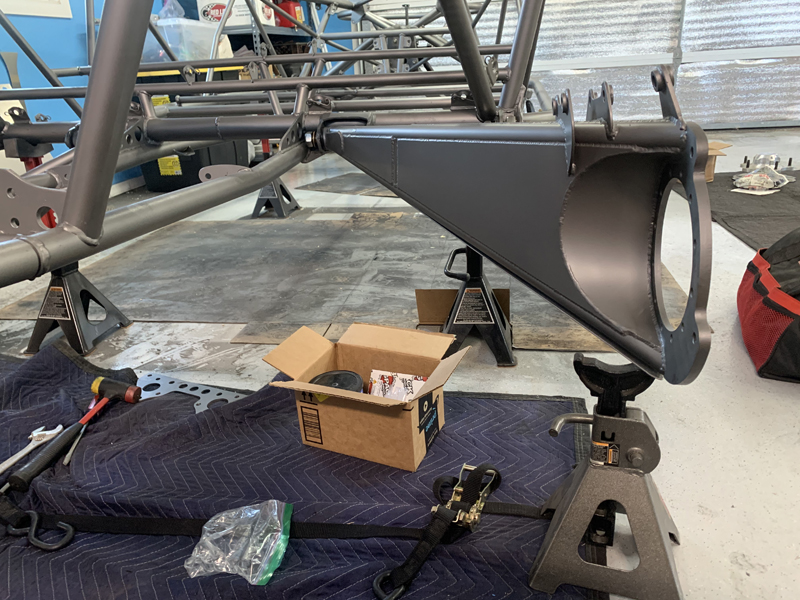
Front suspension assembled, awaiting spring
carriers and bypass shocks
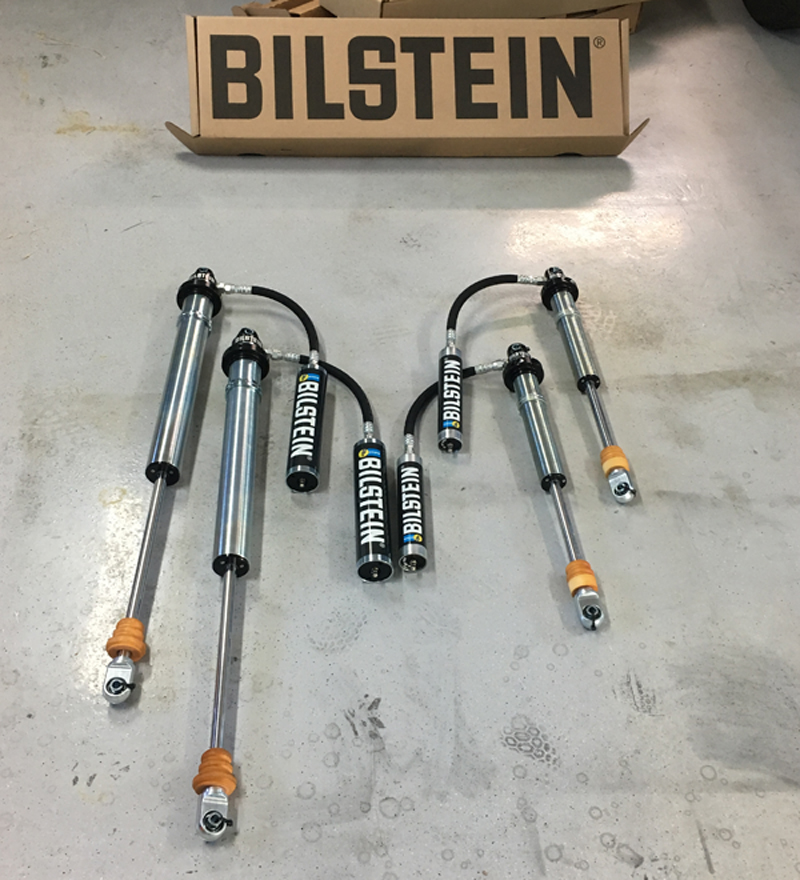
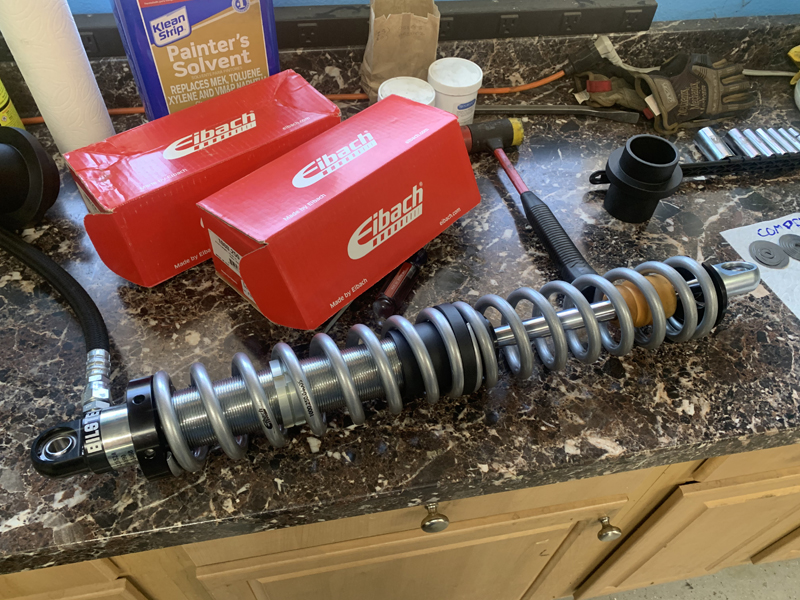
Our Bilstein "coil over" shocks
These are the "coil overs" for all 4 positions; once we
receive and install the springs, we'll mount them on the car and
no longer need jack stands to support the car - it'll be a true
"roller" at that point. Before we can do that,
we need to modify these to be "spring carriers" only; they're
currently "coil over shocks" and we want all the damping to
provided by the bypass shocks that will be installed. That's
a simple modification - disassemble them, remove
the shim stacks from each, then reassemble. We haven't ordered
our
bypass shocks yet; we'll probably wait until we're a little
further along in the build.
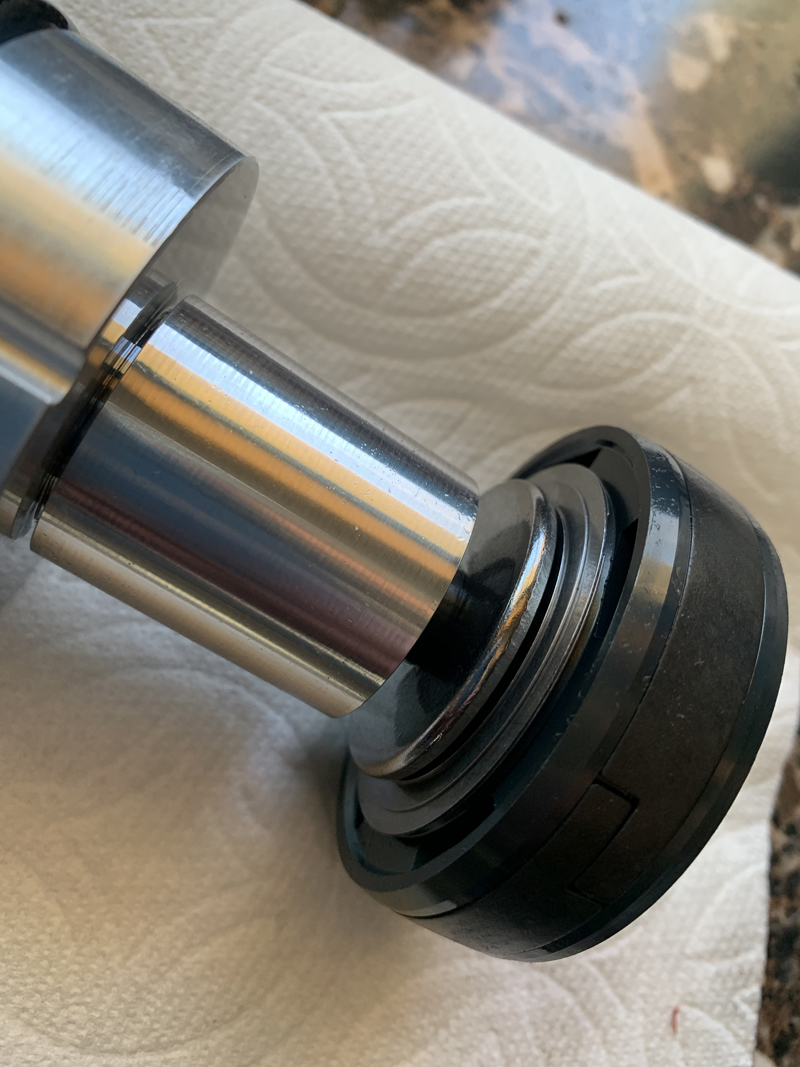
Rear Coil-Over piston and shim stack

Front Coil-Over shock piston with shim
stack as received
We don't want the coil-overs to provide any suspension damping
so the shim stacks have to go. It's an easy process once
the shock is disassembled; just remove the nut that secures the
piston/shim stack, remove the shims, add washers to fill the gap
then reinstall the nut.
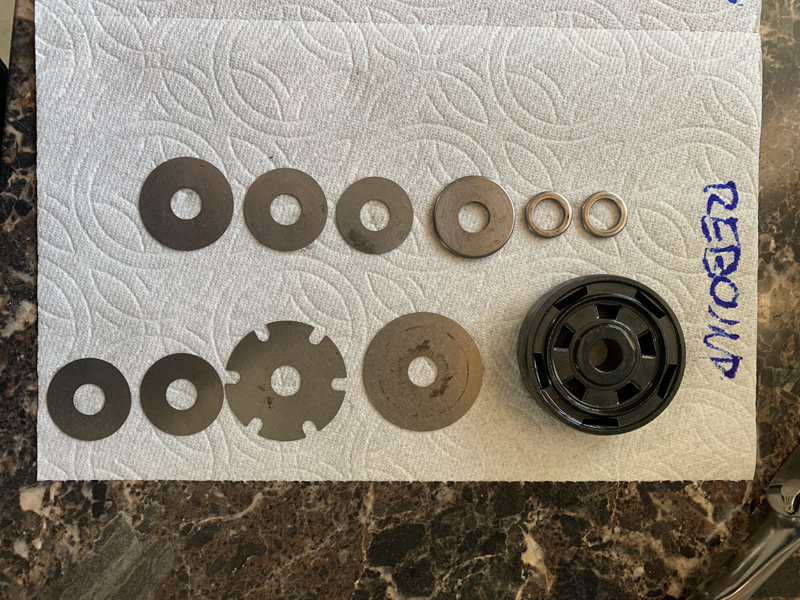
Shims and Piston from a rear coil-over
Front "coil-carrier" reassembled without a
"shim stack"
We modified the front coil carrier spring seats to eliminate
a small interference issue with the lower control arms - they're
ready to mount now. The black "slider" that separates the
two springs can be installed "short side up" or "long side up"
to optimize where the spring rate changes in conjunction with
the adjustable "stop ring".
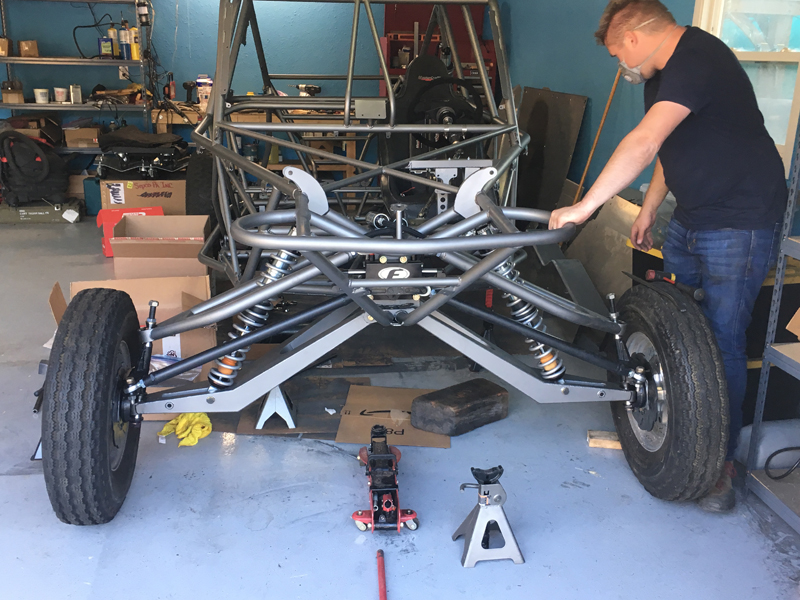
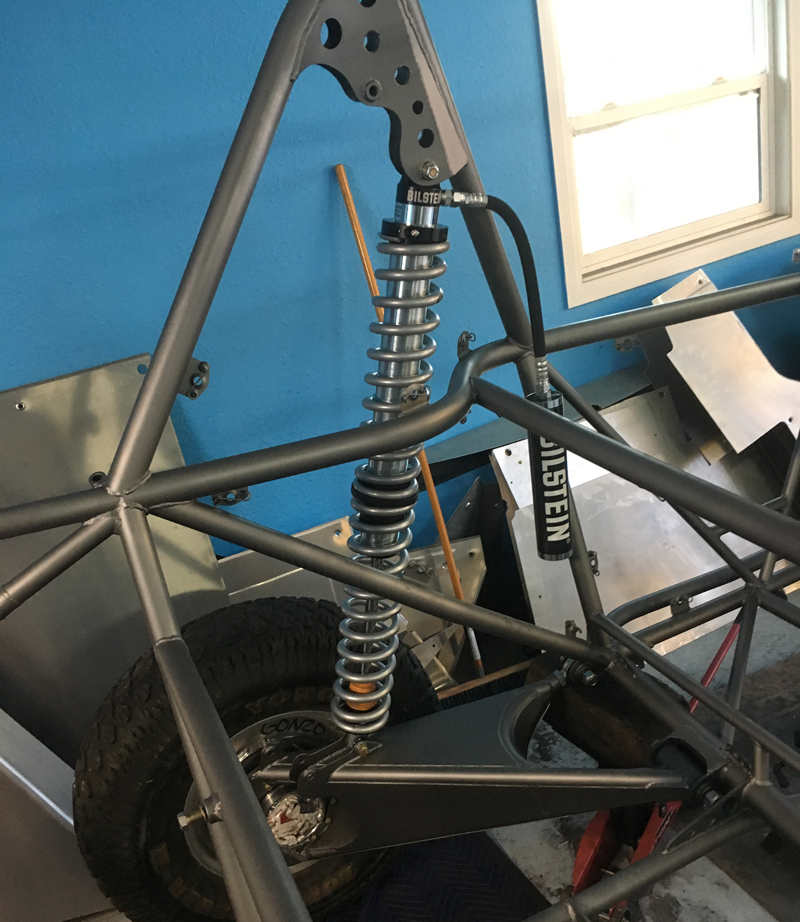
Front spring carriers installed and
supporting the car
The spring carriers are supporting the weight of the front
end at this point - we haven't set any pre-load to adjust the
ride height yet. Again, the camera distorts the apparent
camber and alignment of the front wheels - it looks right in
person but we haven't done any "fine tuning" yet.
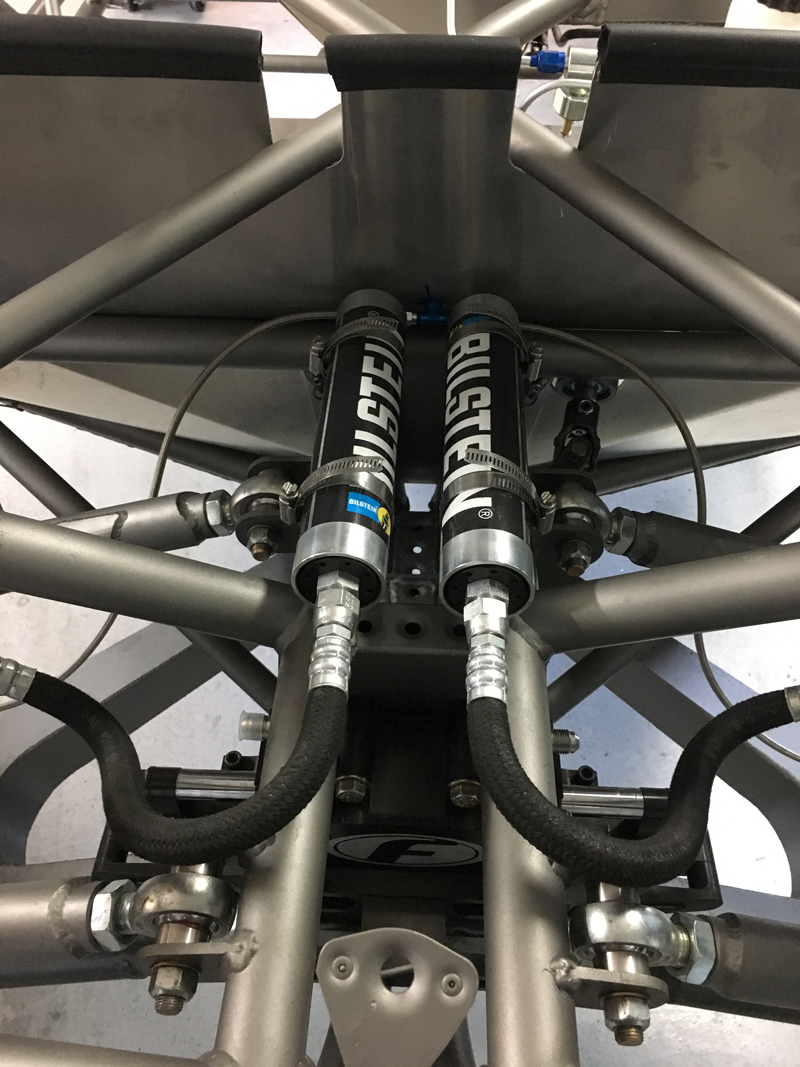
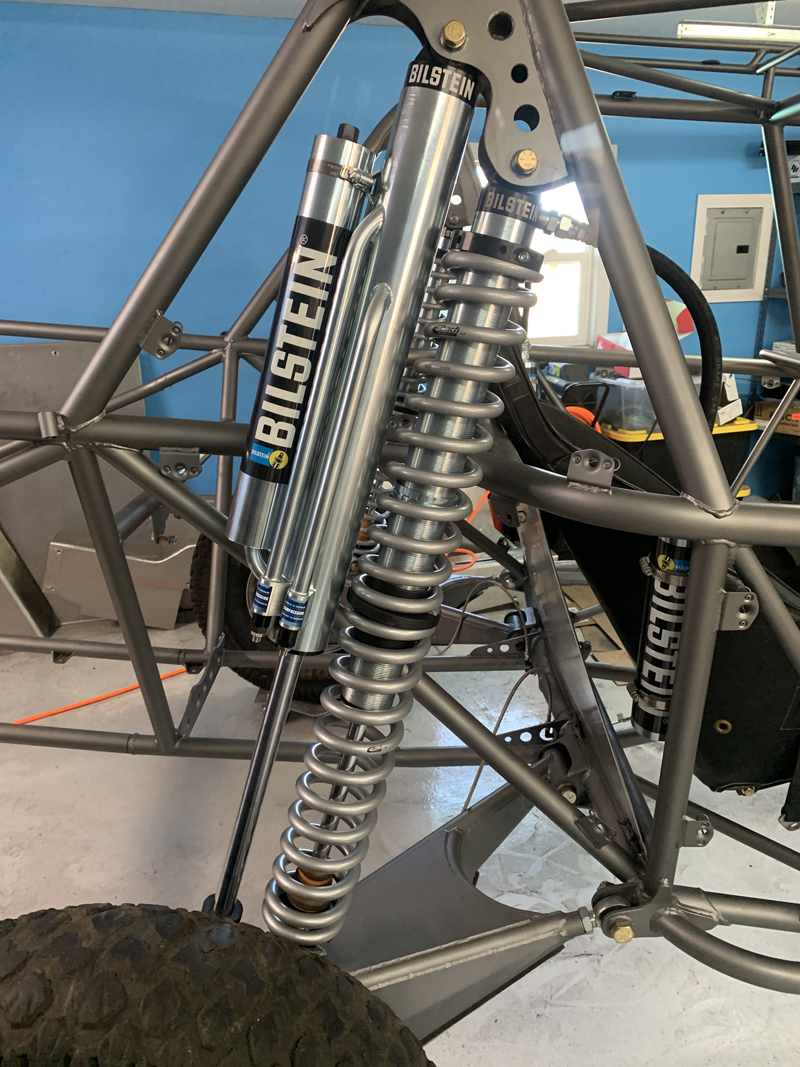
Front coil over reservoirs mounted
Front bypass shock installed
We had been concerned about possibly needing to modify the
upper control arms for bypass tube clearance but Bilstein bypass
shocks allow the installer to "clock" the upper mount as
necessary. By rotating the upper cap a few degrees, we
were able to avoid having to modify the control arm.
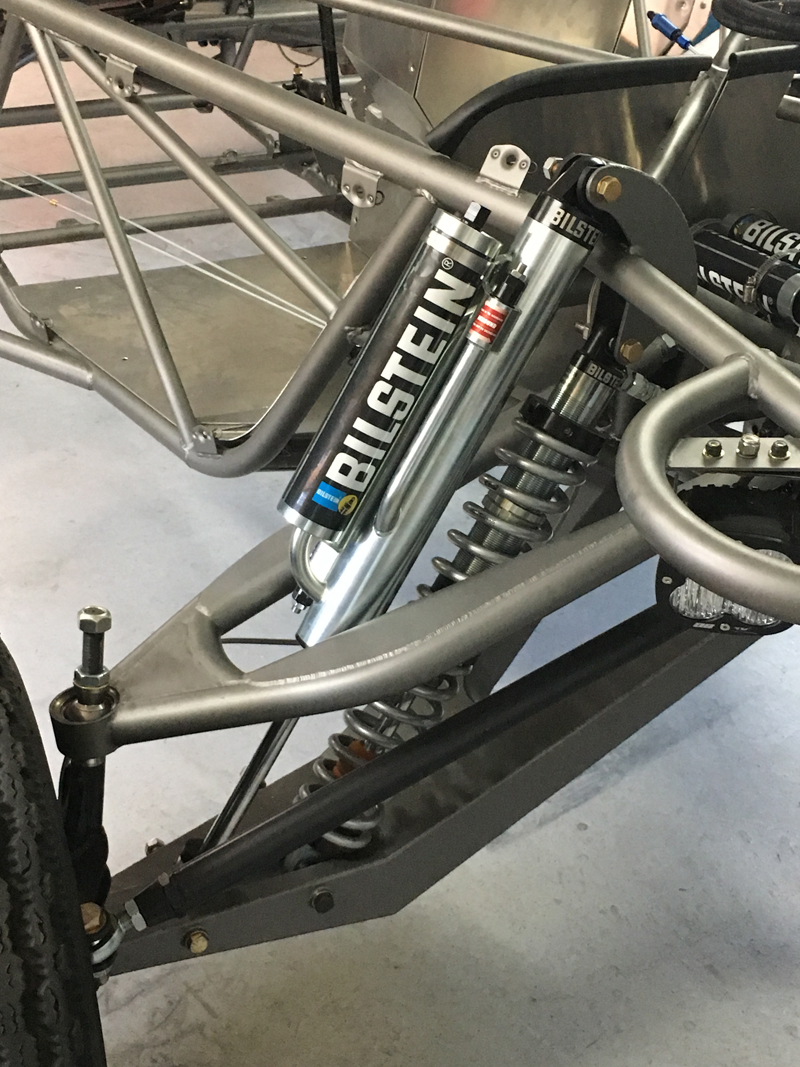
Front suspension complete
The front suspension is now completely assembled and ready
for limit straps to be purchased and installed. We need to
measure for the limit straps next; we'll want to support the
front end at "full droop" when we measure to ensure that we
don't unnecessarily restrict down travel while still protecting
the suspension from over-extension.
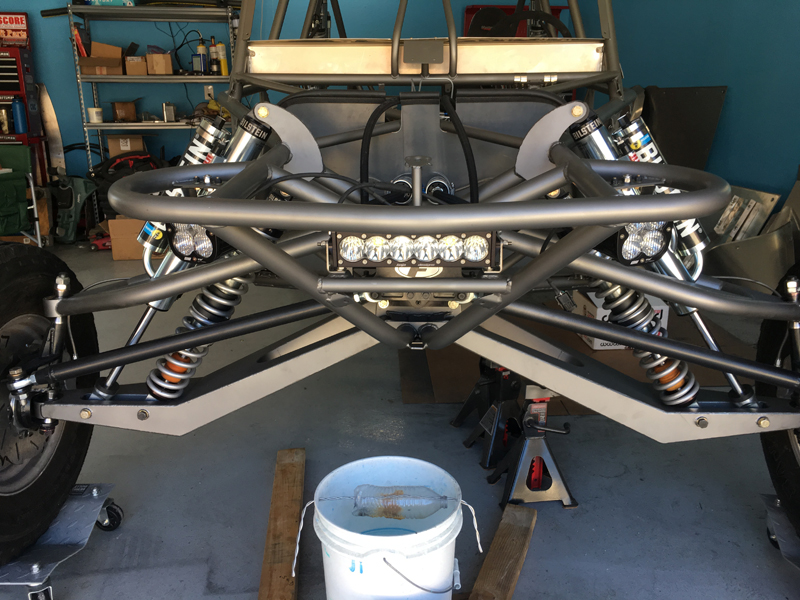
Left rear coil carrier installed
Right rear coil carrier and bypass shock
The car is now supporting it's own weight - all four spring
carriers are installed and the jack stands removed.
Finally, we have a true "roller" chassis and can begin
fabricating and installing all the other systems; we'll start
with the primary driver controls (steering and brakes) and build
outward from there. |